
How I automated my irrigation system with Home Assistant
Find out how to automate your garden watering with Home Assistant and ESPHome. Save time, energy and water.
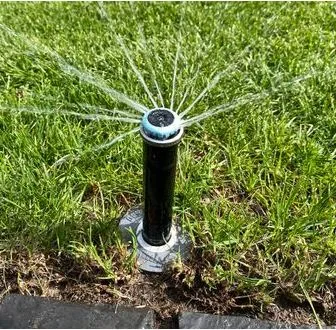
If you have a garden, you know how important and tiring it is to take care of watering your plants, especially in spring and summer, when temperatures rise and rain is scarce. To avoid having to get up early in the morning or having to ask someone to do it for you when you are away, I decided to create an automated irrigation system, which is activated and deactivated based on my preferences and the weather situation. In this article I show you how I did it, using Home Assistant as the platform. Home Assistant is a platform that allows you to control and automate your smart devices, such as lights, thermostats, cameras, sensors, etc. The yaml code I used for Home Assistant consists of four main parts: input_boolean, input_datetime, input_number and automation. Let's see in detail what these parts do and how I configured them. The code for automated irrigation is made up - as mentioned above - of four main parts:
Boolean entities
- The first part defines input_boolean entities, which are buttons you can use to select the days of the week on which you want irrigation to be active. You can choose which days to enable or disable simply by clicking on the buttons in the Home Assistant graphical interface. Each button has a name, which corresponds to the day of the week, and an initial state, which is set to true, i.e. active.
# Define entities for days input_boolean: Monday: name: "Monday" initial: true Tuesday: name: "Tuesday" initial: true Wednesday: name: "Wednesday" initial: true Thursday: name: "Thursday" initial: true Friday: name: "Friday" initial: true Saturday: name: "Saturday" initial: true Sunday: name: "Sunday" initial: true
Entity of type input_datetime
- The second part defines entities of type input_datetime, which are selectors that you can use to set the start and end times of irrigation. You can choose the time you prefer using the arrows or by typing the numbers in the Home Assistant graphical interface. Each selector has an id, which is used to identify it in the code, a name, which is visible in the graphical interface, and an initial value, which is set to "08:00" for the start time and "09:00" for the end time.
Define entities for watering times input_datetime: start_time: name: "Start time" has_date: false has_time: true initial: "08:00" end_time: name: "End time" has_date: false has_time: true initial: "09:00"
the input_numerb type
- The third part defines input_number entities, which are sliders you can use to set the duration and frequency of watering. You can choose the number of minutes you want watering to last and the number of days you want to pass between waterings by using the arrows or typing numbers in the Home Assistant graphical interface. Each cursor has an id, which serves to identify it in the code, a name, which is visible in the graphic interface, a minimum and maximum value, which limit the choice range, a step, which indicates the increase or decrease of each click, a unit of measurement, which specifies whether it is minutes or days, and an initial value, which is set to 10 for the duration and 2 for the frequency.
# Define entities for watering duration and frequency input_number: duration: name: "Duration" min: 1 max: 60 step: 1 unit_of_measurement: min initial: 10 frequency: name: "Frequency" min: 1 max: 7 step: 1 unit_of_measurement: days initial: 2
Automations
- The fourth part defines automations, which are rules that perform actions based on triggers and conditions. In this case, there are two automations: one for the start and one for the end of irrigation. The start of the automation has as its trigger the start time set by the selector, as its condition the state of the rain sensor, which must be turned off, and the day of the week, which must correspond to one of the days enabled by the buttons, and as its action the turning on of the solenoid valve, which activates irrigation, followed by a delay equal to the duration set by the cursor, and the turning off of the solenoid valve, which ends irrigation. The automation for the end has as its trigger the end time set by the selector and as its action the turning off of the solenoid valve, which serves to interrupt irrigation in the event of an error or delay.
# Define the automations to start and stop irrigation based on the set conditions automation: - id: irrigation_start alias: "Irrigation start" trigger: - platform: time at: input_datetime.start_time condition: - condition: state entity_id: sensor.virtual_rain_sensor state: "off" - condition: template value_template: "{{ states('sensor.date') in (state_attr('input_boolean.Monday', 'last_changed')|string|replace(' ','T')|as_timestamp|timestamp_custom('%Y-%m-%d'), state_attr('input_boolean.Tuesday', 'last_changed')|string|replace(' ','T')|as_timestamp|timestamp_custom('%Y-%m-%d'), state_attr('input_boolean.wednesday', 'last_changed')|string|replace(' ','T')|as_timestamp|timestamp_custom('%Y-%m-%d'), state_attr('input_boolean.thursday', 'last_changed')|string|replace(' ','T')|as_timestamp|timestamp_custom('%Y-%m-%d'), state_attr('input_boolean.friday', 'last_changed')|string|replace(' ','T')|as_timestamp|timestamp_custom('%Y-%m-%d'), state_attr('input_boolean.Saturday', 'last_changed')|string|replace(' ','T')|as_timestamp|timestamp_custom('%Y-%m-%d'), state_attr('input_boolean.Sunday', 'last_changed')|string|replace(' ','T')|as_timestamp|timestamp_custom('%Y-%m-%d')) }}" action: - service: switch.turn_on entity_id: switch.Elettrovalvolaxxxxx - delay: "{{ states('input_number.duration')|int }}min" - service: switch.turn_off entity_id: switch.Elettrovalvolaxxxxx - id: fine_irrigation alias: "End of irrigation" trigger: - platform: time at: input_datetime.ora_fine action: - service: switch.turn_off entity_id: switch.electrovalvolaxxxxx
Remember to replace:sensor.virtual_rain_sensor with the name of your virtual rain sensor switch.Elettrovalvolaxxxxx: with the switch of your solenoid valve. In conclusion, in this article I showed you how I automated my irrigation system with Home Assistant which allowed me to control and program the irrigation of my garden in a simple and flexible way. The advantage of this project is that I was able to have an intelligent irrigation system, which was activated only on the days and times that I chose, and which took into account the weather situation, avoiding irrigating when it rained. The result was an efficient irrigation system, which saved me water, energy and time. In the future, I would like to add more sensors, such as a soil moisture sensor, that will allow me to adjust watering based on the needs of the plants.


Commenti
Ancora nessun commento. Sii il primo a partecipare.